Walkthrough Chapter 1: Lockdown
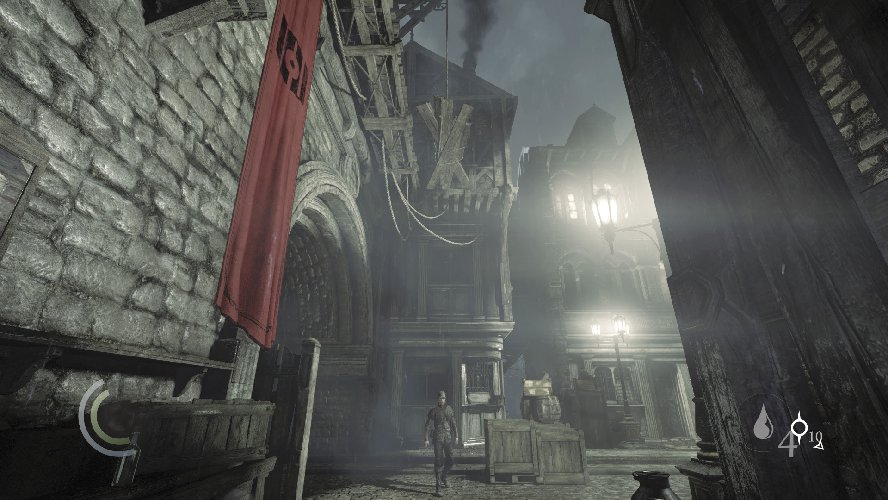
Something weird has happened and The City has mysteriously changed. It’s time to find some answers and clear up what’s going on. The first step is to return to the clock tower and look for clues. A sickness called the gloom is roaming the streets so the Baron’s Watch has locked down The City. Getting there might be a problem.
Chapter StatsCollectible Loot Items: 4 Common Loot Items: 60 Pockets to Pick: 12 Locks to Pick: 8 Threats (Guards): 15 |
Thieving Challenges
| Challenge | Playstyle | Reward | |
|---|---|---|---|
 |
Remain undetected | Ghost | 125 G |
 |
Extinguish 9 flames | Opportunist | 100 G |
 |
Headshot 4 threats | Predator | 75 G |
 |
Lift all loot items | Hybrid | 150 G |
Objective 1: Head to the Clock Tower
Area 1: Enclosure

Common Loot
| Map Icon | Item(s) |
|---|---|
 |
Flask |
 |
Gear |
Documents
| Map Icon | Item(s) |
|---|---|
 |
The Benefits of Strict Curfew |

It’s a dark and stormy night—the perfect environment for thieving. Search the first area for a number of valuables, including a flask that sits atop the railing near the stairs.
 Thieving Challenge: “Lift all loot items” (1/60)

Climb the cabinet at the alley’s east end to reach a gear that’s hidden on a high pipe. Enter the cabinet afterward if you wish to save.
 Thieving Challenge: “Lift all loot items” (2/60)

Scale the north stairs to discover a newspaper. This is the first document you can find in this chapter but is the second document you’ve found in the game.
GOODIE BOXDocument #2 Newspaper (1/13) “The Benefits of Strict Curfew” |

When you’re ready to advance, descend the east stairs and scale the north wall to reach a ladder leading up to the roofs.

Grab the sack of food after climbing the ladder, then scale another wall to ascend even higher. Garrett catches a view of the distant clock tower from up here.

Collect a gear from the higher roof before dropping down to the next roof to the north.
 Thieving Challenge: “Lift all loot items” (3/60)
Area 2: Traitorsgate

Common Loot
| Map Icon | Item(s) |
|---|---|
 |
Gear |
 |
Coin purse |
 |
Gear |
 |
Gold coin |
 |
Gold coin |
 |
Pen |
 |
Candlestick |
Collectible Loot
| Map Icon | Item(s) |
|---|---|
 |
Amethyst Circle |
Documents
| Map Icon | Item(s) |
|---|---|
 |
Lockdown Regulations |

You’ve reached Traitorsgate. Eavesdrop on the pair of guards in the street below, who begin to walk. They’re a bit disgruntled but are intent on enforcing the lockdown. You’d best keep well out of sight.

To easily sneak past the guards, do not drop from the roof, but move onto the west walkway instead. From there, you can climb up to a thick pipe that spans the street, moving to the Backway unseen.

The guards have important loot to steal, however, so it’s worth dropping from the roof. One guard remains at the street’s west end; the other patrols the length of the street. Carefully drop to the dark south alcove and lurk in the shadows as you wait for the patrolling guard to approach.

When the guard moves past, heading east, quickly sneak behind him and knock him out, then search his body to discover a document and lift his gold. If you don’t wish to knock out the guard, you can pick his pocket and swoop back to the shadows, but this is far more challenging, and you may wish to steal the document and the coin purse on separate attempts.
GOODIE BOXDocument #3 Chapter 1 (1/2) “Lockdown Regulations” |
House Haul

Next, move to the door of the street’s central building. There’s no one inside, so enter without bothering to peek through the keyhole. If the patrolling guard is still about, close the door behind you.

Inside the building, collect a water arrow and a coin purse. That’s all there is here, so head back outside.
 Thieving Challenge: “Lift all loot items” (4/60)

Leave the house without being spotted and go east a bit. Slip into the dark north alley and climb some crates to reach the Backway.
Area 3: Backway

The Backway is dark, but don’t make any noise, for a guard is tending to a corpse on a table. This guard has apparently left his helmet back at the barracks, making him a prime target for a headshot if you’re after Thieving Challenges. You just need to find a suitable arrow.

Leave the guard be for the moment and climb the east wall to reach a secret side area. Drop down and collect two water arrows from the far barrel.

Climb back up the wall and move along a wooden walkway, heading toward the guard. Step out onto the short beam, and you can execute a stunning aerial takedown on the guard. Don’t do this if you’re after Thieving Challenges, though.

Again, ignore the guard and climb up to a higher balcony to the north. Move to the balcony’s end and collect a gear, but don’t climb the north wall.
 Thieving Challenge: “Lift all loot items” (5/60)
Here Come the Headshots

Sneak back to the south and drop to the ground. If you like, sneak up behind the guard and steal his coin purse.

Sneak around the Backway’s central tree and notice the arrows on the table near the guard. Wait until the guard is facing north, then sneak up to the table and collect the two broadhead arrows.

Now you’re ready to kill the guard. Ready a broadhead arrow and aim at his head. Wait until the targeting reticle narrows and becomes surrounded by red crosshairs, then kill the guard with a headshot. If you take too long, the reticle will begin to expand—press the Cancel button to quit aiming and try again.
 Thieving Challenge: “Headshot 4 threats” (1/4)

Move to the Backway’s north end and climb over the wall to return to Traitorsgate.

The remaining Traitorsgate guard has no gold to steal, but you can slay him with another headshot if you’re after Thieving Challenges. His helmet covers the top half of his head, but the sides of his head are merely covered by cloth, and his face is exposed. Fire an arrow at any of these spots to kill the guard with a headshot.
 Thieving Challenge: “Headshot 4 threats” (2/4)
Traitorsgate Loot

It’s worth taking out the Traitorsgate guards, for this lets you easily plunder a collectible loot item. Search near the southwest barrel and cart to discover a precious ring that sits in a jewel box on the ground. This ring is almost impossible to claim without neutralizing the guards, for the area is well lit. Your only hope would be to create a distraction with a throwable.
GOODIE BOXCollectible Loot #2 Serendi Stone Circles (1/7) “Amethyst Circle” |

Backtrack toward the Backway and snatch the pair of gold coins that lie on the ground right near the wall you’ve just climbed over. Climb back over the wall to the Backway.
 Thieving Challenge: “Lift all loot items” (7/60)
Moving On

If you’ve left the Backway guard alive, you’ll need to sneak past him to reach the climbable north wall. If you like, you can use a water arrow to douse the brazier near the Backway guard, then slip past him and climb the wall before he relights the brazier. This isn’t necessary, though, for you can simply take the higher path by climbing the east wall and crossing the north balcony.

After climbing the north wall, drop to the dark alley below. Collect a pen from the alley’s east end, then pick the lock on the west gate.
 Thieving Challenge: “Lift all loot items” (8/60)

Collect the sack of food on the ground beyond the gate, then close the gate so you may reach the candlestick on the north canister.
 Thieving Challenge: “Lift all loot items” (9/60)

Maneuver past some crates and debris to reach the next area, tapping the Interact button to heave a fallen beam out of your way.
Objective 2: Find a Way Into the Jeweler’s Shop
Area 4: Stonecutter’s Court

Common Loot
| Map Icon | Item(s) |
|---|---|
 |
Gold coin |
 |
Gold coin |
 |
Gold coin |
 |
Knife |

More guards patrol this area, intent on enforcing the lockdown. One of the guards notices a precious mask in the window of the nearby jeweler’s shop. Sounds like something worth stealing.

Remain on the roof and watch the guards’ patrol routes. Two guards walk a long patrol down the street, while a third guards walks a shorter patrol up north. The jeweler’s shop stands to the west, and there’s a dark alley behind you, to the east.

When you’re ready, sneak north along the rooftops. Drop from a narrow beam to reach a dark alcove at the street level.

Remain in the shadows as you move to collect a single gold coin that sits atop one of the crates in the street. Keep well out of sight of the patrolling guards.
 Thieving Challenge: “Lift all loot items” (10/60)

After collecting the coin, notice a small box atop a nearby barrel. Pick its lock and claim two valuable broadhead arrows and a water arrow.

The front door of the jeweler’s shop is locked. You could try to pick the lock, but the patrolling guards may notice you. There are easier ways of infiltrating the shop, so ignore it for now and sneak into the dark east alley, which is free of guards.
Area 5: Stonecutter’s Court East

Flee to the dark east alley if the guards are ever in pursuit, for you can climb up to higher ground. Before you climb anything, swipe the gold coin that sits near a barrel in the east alley.
 Thieving Challenge: “Lift all loot items” (11/60)

Now climb onto the tall crates at the alley’s north end to reach two broadhead arrows.

Next, scale the west wall to reach a roof. Leap across the gap to access the east shelf, where another gold coin sits in a bird’s nest.
 Thieving Challenge: “Lift all loot items” (12/60)

With the east alley fully plundered, take the south stairs down to visit the Underpass.
Area 6: Underpass

Common Loot
| Map Icon | Item(s) |
|---|---|
 |
Coin purse |
Documents
| Map Icon | Item(s) |
|---|---|
 |
Clock Tower Stops Again! |

The east alley’s southern stairs lead to a beggar-filled Underpass. There’s nothing for you to fear here, except maybe the plague. If you’re feeling cruel, douse the beggars’ fire with a water arrow. However, there are other flames to extinguish, so there’s no need to waste a water arrow here.

Navigate the Underpass until you reach a door. Open it and collect a newspaper and some food from the small storage room beyond. Close the door afterward to discover a lost coin purse on the ground.
 Thieving Challenge: “Lift all loot items” (13/60)
GOODIE BOXDocument #4 Newspaper (2/13) “Clock Tower Stops Again!” |

After collecting your plunder, crouch and enter the nearby crawl space. Scale a wall within the crawl space to reach a higher passage that leads back outside.
Area 7: Stonecutter’s Court West

The Underpass has led you to Stonecutter’s Court’s west alley, which is also unguarded. You could also have reached this alley by climbing the wall near the flickering streetlight, but one way is as good as another. Navigate the alley, heading north.

Just past the alley’s beggars, there’s a crate that you can climb to reach a hanging rope. By climbing this rope, you can sneak into the jeweler’s shop via a second-floor window. There are other ways to enter the shop, however, so ignore the rope for now.

You soon come to a locked gate. There’s a locked door nearby as well, which leads into the jeweler’s shop cellar. For now, pick the lock on the gate, then go through.
The North Guard’s Gold

Crouch and sneak to the top of the stairs beyond the gate. You’ve come full circle and are now close to the street’s north guard. This fortunate soul possesses two tantalizing purses. When he turns his back to you, move up the stairs and peek around the edge of the nearby table.

Wait patiently near the table until the two patrolling guards arrive. When they move away, swoop toward the north guard the moment he turns his back and pick his pocket. You don’t have much time, so head to the north shadows afterward and look for a chance to steal his other purse. (You won’t be seen if you remain crouched and stationary in these shadows.) Of course, it’s much easier to simply knock out the guard, grab his body, and drag him back into the west alley.

Then again, headshots are something worth going after in this chapter. The basic idea is the same: Peek around the table until the two patrolling guards arrive and leave, then step out and slay the north guard with a broadhead arrow to the face. Quickly collect his body and hide it in the alley before the patrolling guards return.
 Thieving Challenge: “Headshot 4 threats” (3/4)
If you’re feeling really aggressive, you can bring the overhead hanging boards crashing down on the north guard. Broadhead arrows will do the trick. If you’re determined to do this, ensure that the guard is standing near the street’s north crates when you fire, and he’ll be crushed. The noise is sure to alert the patrolling guards if they’re anywhere nearby, and they’ll also spot the body if you aren’t quick to move it, so don’t do this unless you’re feeling particularly nasty.

However you choose to tackle the north guard, be sure to collect his coinage, along with the knife that sits atop the table near the west alley’s stairs.
 Thieving Challenge: “Lift all loot items” (14/60)
Entering the Jeweler’s Shop
The north guard is a fairly easy mark, but the two patrolling guards aren’t worth your trouble. They have no gold to steal, so leave them be and turn your attention to entering the jeweler’s shop. There are four access points:

The locked front door. This is a bad option, for picking the difficult door lock is risky with the two patrolling guards nearby. There’s also a guard patrolling inside the shop just beyond the door.

A high crawl space in the north wall. This is a good way of entering, as it takes you to the first floor’s rafters, in good position to surprise or avoid the patrolling guard inside the shop.

The locked cellar door in the west alley. This is another good way of entering, as you can explore the shop floor by floor, from bottom to top. The jeweler is busy working in the cellar and is easy to slip past or neutralize with a stealth takedown.

The west alley’s rope, which leads up to a high window. This places you on the shop’s first floor, right near the stairs, where no guards patrol.
For the purposes of this walkthrough, enter the shop through the locked cellar door and get the drop on the jeweler.
Objective 3: Steal the Jeweled Mask
Area 8: Serendi Jeweler’s Cellar

Common Loot
| Map Icon | Item(s) |
|---|---|
 |
Letter opener |
 |
Ink bottle |
 |
Cup |
 |
Bracelet |
 |
Pile of coins |
Collectible Loot
| Map Icon | Item(s) |
|---|---|
 |
Lyegrove’s Jeweled Mask |
Documents
| Map Icon | Item(s) |
|---|---|
 |
Lyegrove’s Letter |

The jeweler’s cellar is small but filled with valuables. The jeweler is busy working down here, moving between two tables. Close the door behind you, or the jeweler may notice that it’s open.

Before you do anything, enter the nearby cabinet to save your progress. Knocking out the jeweler is the safest option, but you can also leave him be and extinguish the cellar’s candles, then silently plunder the cellar under cover of darkness. Either way, be sure to extinguish all of the candles and lift the jeweler’s two coin purses.
 Thieving Challenge: “Extinguish 9 flames” (4/9)

Collect the letter on the east desk. This letter counts as a document and provides a useful clue that will soon come in handy.
GOODIE BOXDocument #5 Chapter 1 (2/2) “Lyegrove’s Letter” |

Now loot the basement, searching every drawer and cupboard. Don’t miss the fire arrow in the box on the crate—it can be used to ignite kerosene spills or to bring hanging boards crashing down on unsuspecting guards.
 Thieving Challenge: “Lift all loot items” (19/60)
The Genuine Article

Inspect the painting in the room’s southwest corner. Search for a trigger along the edge of the frame and press it to discover a wall safe.

This wall safe has a combination lock that can’t be picked. Instead, you must know the combination. Have you figured it out? The combination is hidden in the letter you’ve just discovered: 7, 3, 9.

Open the safe to discover the Jeweled Mask that you seek. Excellent! Now you just need to get out of here.
GOODIE BOXCollectible Loot #3 Unique Loot (2/9) “Lyegrove’s Jeweled Mask” |
Objective 4: Exit by the Upstairs Window

Now that you’ve found the Jeweled Mask, it’s time to move on. Of course, there’s plenty more loot to steal inside the jeweler’s shop if you like. Sneak upstairs to the first floor.
Area 9: Serendi Jeweler’s Shop

Common Loot
| Map Icon | Item(s) |
|---|---|
| Hall | |
 |
Ink bottle |
 |
Candlestick |
 |
Candlestick |
 |
Letter opener |
| Study | |
 |
Cup |
 |
Gold coin |
 |
Letter opener |
 |
Pile of coins |
 |
Candlestick |
 |
Pile of coins |
 |
Ink bottle |
| Showroom | |
 |
Earrings |
 |
Bracelet |
 |
Ring |
 |
Brooch |
 |
Necklace |
 |
Brooch |
 |
Necklace |
 |
Bracelet |
 |
Bracelet |
 |
Earrings |
 |
Necklace |
 |
Brooch |
 |
Ring |
 |
Bracelet |
 |
Earrings |
 |
Necklace |
 |
Gold coin |
 |
Pile of coins |
 |
Pile of coins |
 |
Ink bottle |
Collectible Loot
| Map Icon | Item(s) |
|---|---|
 |
Sootback Bracelet |
 |
Jeweled Mask |

When you reach the top of the cellar stairs, you’ll be near an open window on the shop’s first floor. This is the same window you could have snuck through had you climbed the rope in Stonecutter’s Court’s west alley. If you’re in a hurry to move on, simply head upstairs to reach the Residence floor, which you can easily sneak through. If you’re more interested in loot, ignore the stairs and use the nearby cabinet to save.

Exit the cabinet and get on top of it. From there, climb up onto the overhead rafters. Now you can sneak around the entire shop without fear of the two guards detecting you. (A third guard is fast asleep in a chair upstairs.)
Rafter Action

Looting the shop is much easier after neutralizing both guards, so let’s take them out. Move onto the large pipe that runs along the north wall to reach the shop’s showroom.

This is where you would have entered the shop had you scaled its north wall. Wait for the patrolling guard to pause near the pipe, then knock him out with an aerial takedown. If you like, drop and pick this one’s pocket first.

Now for the guard in the study. This guard has fallen fast asleep in a chair. Pick him off with a headshot, or simply knock him out with a stealth takedown.
 Thieving Challenge: “Headshot 4 threats” (4/4)
Looting the Shop

With both guards neutralized, you’re free to plunder the shop. As always, search every drawer and cabinet, including the display cases in the store. When you think you’ve cleared out a room, use Focus to ensure you haven’t missed anything.

The safe in the study sports a difficult lock, but the valuables inside are well worth stealing. Inside you’ll find a pile of gold coins and a collectible loot item.
GOODIE BOXCollectible Loot #4 The Mortal Coils (1/6) “Sootback Bracelet” |

The locked drawer in the showroom contains a Jeweled Mask—the fake one that Lyegrove made. Though it isn’t genuine, it’s a good enough fake to count as a collectible loot item—the last one in this chapter.
GOODIE BOXCollectible Loot #5 Client Loot (1/8) “Jeweled Mask” |

One piece of loot may even escape your Focus. It lies up high, above the rafters, in the study’s south corner. Cross the rafters to reach it.
 Thieving Challenge: “Lift all loot items” (50/60)

Drop from the rafters after claiming this last piece of loot and pinch out the candle in the study.
 Thieving Challenge: “Extinguish 9 flames” (5/9)

When you’ve finished looting the shop, sneak upstairs to explore the Residence.
Area 10: Serendi Jeweler’s Residence

Common Loot
| Map Icon | Item(s) |
|---|---|
 |
Cup |
 |
Cup |
 |
Pile of coins |
 |
Letter opener |
 |
Cup |
 |
Pile of coins |
 |
Cup |
 |
Earrings |
 |
Cup |
 |
Hairbrush |
Documents
| Map Icon | Item(s) |
|---|---|
 |
Who Watches the Watch Hounds? |

The second floor is where the jeweler and his wife make their home. There’s another guard up here, but he’s fallen asleep in a chair. End him with an arrow to the face if you’re still in need of headshot kills. You can also perform a stealth takedown by sneaking into close range or you can simply sneak past him.

Pinch out the nearby candle and pillage the room. Collect two cups, along with the food on the table.
 Thieving Challenge: “Extinguish 9 flames” (6/9)
 Thieving Challenge: “Lift all loot items” (52/60)

Sneak into the room across the hall to find the jeweler’s wife sitting by the fire. There’s no need to knock her out; you can loot the room without detection. Raid the drawers of the south desk and small east table, and carefully swipe the cup from the table near the woman.
 Thieving Challenge: “Lift all loot items” (56/60)

Return to the hall and silently enter the east bedroom, being careful not to alert the caged bird in the hall. Collect the newspaper that rests on the bed to obtain a new document.
GOODIE BOXDocument #6 Newspapers (3/13) “Who Watches the Watch Hounds?” |

Return to the hall and sneak to its north end. Don’t climb through the open window just yet, as there’s no coming back. Instead, swipe the cup on the table in the room with the jeweler’s wife, and collect the hairbrush in the east bathroom. Congratulations, you’ve now found every piece of loot in this chapter!
 Thieving Challenge: “Lift all loot items” (60/60)

When you’ve finished looting the jeweler’s, climb through the open window at the north end of the residence’s hall to advance to the next area.
Objective 5: Continue to the Clock Tower
Area 11: Blackfurrow Alcove

Documents
| Map Icon | Item(s) |
|---|---|
 |
Lockdown! |

You’ve bypassed the lockdown—now you just need to reach the clock tower. Drop from the jeweler’s window to reach a dark alley, and collect the newspaper on the nearby bench to acquire a new document.
GOODIE BOXDocument #7 Newspapers (4/13) “Lockdown!” |

After claiming the newspaper, pry open the window at the alley’s other end. Climb through to enter a small town house.
Area 12: Town House

The town house holds little of interest. Pinch out the candle if you like before exiting through the north door.
 Thieving Challenge: “Extinguish 9 flames” (7/9)
Area 13: Blackfurrow

Exiting the house, you find yourself in another dark alley. Two guards are engaged in a discussion nearby. Sneak up to the crates behind them and have a listen.

If you’re feeling frisky, climb over the crate that’s directly behind one of the guards, then pick his pocket. The other guard is facing right at you, but the one you’re robbing is blocking his view, so you can’t be seen. Climb back over the crate afterward to return to the cover of darkness. (The other guard has nothing of value.)

Whether or not you choose to pickpocket the guard, slip through the shadows and head west along the alley. You soon find a tall crate; climb it to access the nearby porch.
Guards in the Alley

Loop around the porch until you notice two guards having a conversation. Their loud voices bother a woman who’s trying to sleep, and after a bit of verbal harassment, the guards eventually move away.

Continue sneaking through the alley, tailing the guards. They soon pause to light a wall brazier, then continue walking along. You have plenty of time to pick both guards’ pockets as you tail them after they light the first brazier, but you must steal their gold before they reach the second brazier, for they remain in position there once it’s lit.

After you pick the guards’ pockets, backtrack a bit and use water arrows to douse the two wall braziers they’ve lit. Don’t douse the final brazier that they remain near or you’ll raise their suspicions. Just douse the previous two braziers to complete your Thieving Challenge.
 Thieving Challenge: “Extinguish 9 flames” (9/9)
Clock Tower Approach

After picking the guards’ pockets, look for a vertical pipe that you can climb to reach a higher walkway. Maneuvering past the guards, look for some climbable crates that lead to an upper ledge. Use them to reach higher ground.

At this point, you can simply cross the wooden beams and walkways to slip past the remaining guards and reach the clock tower. If you’re feeling more predatory, options abound for aerial takedowns. The stationary guard at the street’s north end is a prime target, as is the patrolling watchman.

The two guards you tailed through the street can also be cleanly killed by dropping the overhead boards on them, just like the north guard back in Stonecutter’s Court. Target the rope’s hinge and unleash an arrow, then sit back and enjoy the carnage. This is likely to draw other guards to investigate, so don’t do this if you’re trying to ghost through the stage.

When you reach the street’s north end, simply scale the high north wall to conclude the chapter. You can also climb onto the east balcony and backtrack a bit to get the drop on the guards you followed before. So many options, so little time.
GOODIE BOXDocument #8 Chapter Recaps (1/8) “Chapter 1” |